Type your Printer Model
Enter your Printer Model number and hit the search button and then follow the installation guide and download the driver to setup your Printer/Scanner on your Windows, Mac, iOS, Android, or Chrome OS.
Manuals and Guides
Read Step-by-Step manuals with Driver Downloads links to official sites and best-in-class manuals for Printer Drivers powered by HNH Network (HownHow)
Setup Guide
Step-By-Step Guide on how you can Setup and Install the Printer, Scanner
Setup Time: 15 minutes
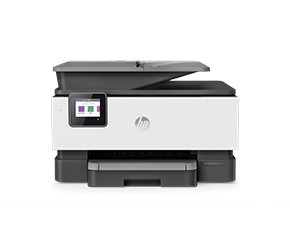
Setup Printers, Scanners Online and Office
A Simple process where you can easily setup and install Drivers compatible for your printers or Scanners and Enjoy printing and scanning wirelessly or with wire.
- Prepare your Printer for connection and Setup.
To setup your printer, All you need to do is Unbox it and remove the protective tape if any and simply plug in the power cord and connect it to a power supply and turn the printer on.
- Up Next, you need to download the driver and install it on your device.
If you are using a smartphone and your Printer is WIFI enabled, you can simply download the Smart Print app either on your iOS or on your Android Smartphones. If you are using a Windows or a Mac computer, you need to open your browser.
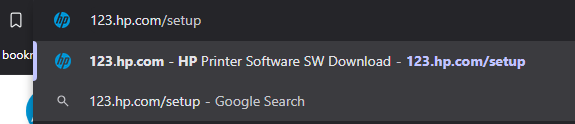
- Visit official website on your browser.
Open your favorite browser and type the official url for your printer on your URL bar and hit enter.
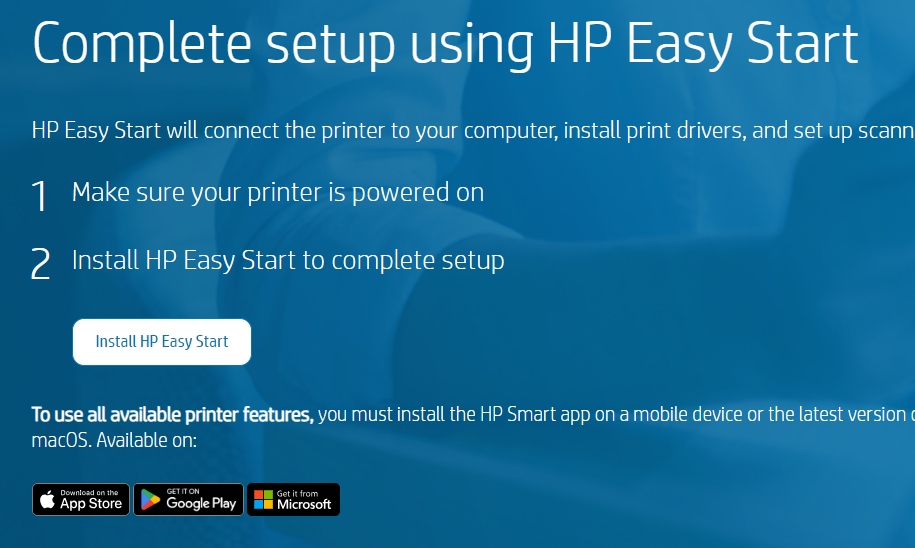
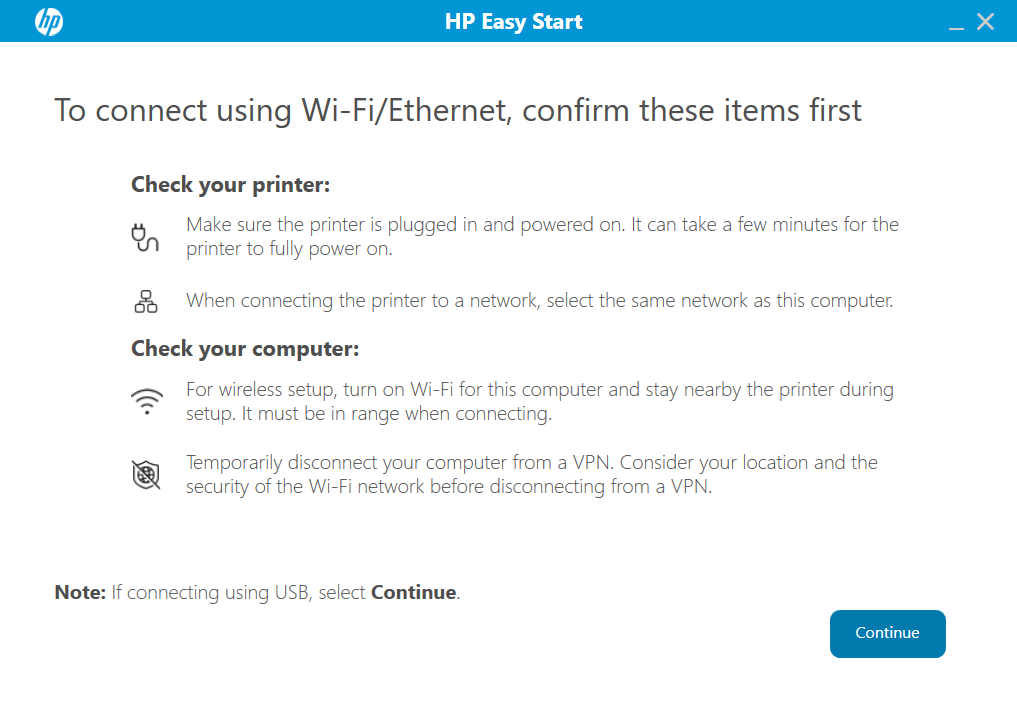
- Install Easy Start Software.
On the frontpage of the official you will see a blue header with a ‘Install Easy Start’ button. Once you click on it you will be able to download the setup file.
- Follow on-screen setup.
Run the installed Setup file and you will get on-screen instructions on how to connect your printer. Once the printer is connected you will be able to see all the information about your printer available on your screen with the Easy Start Application.
- Printer a Test Page, You are ready to go.
Now you can go ahead and print a test page. If everything is alright, which is in most cases, you will be able to print and scan from you device.
Airprint
Setup your Printer with Air Print on Apple Eco System
Setting up your Printer on your Apple Eco-system like Mac, iOS, iPads and other Apple devices is fairly simple with just a few clicks. You do not need any additional drivers or software’s. You can simply follow the steps:
- Connect Printer to Wi-Fi
- Turn on the printer and connect it to the same Wi-Fi network as your iPhone, iPad, or Mac.
- Use the printer’s control panel or the Smart app to connect.
- Ensure AirPrint is Enabled
- Most printers support AirPrint by default.
- No additional drivers are needed.
- Print from iPhone, iPad, or Mac
- Open the document/photo. Tap Share > Print. Select your Printer and tap Print.
- Troubleshooting
- Ensure both devices are on the same Wi-Fi network.
- Restart the printer and device if the printer isn’t detected.
Google Cloud Print
Using Google Cloud Print for Printers
1. Print Using Smart App (Recommended)
Download Smart from the Google Play Store or App Store.
- Connect your printer to the same Wi-Fi network as your device.
- Open the app, select your document/photo, and tap Print.
2. Print via Chrome Browser (Chromebook or Windows/Mac)
- Open Chrome and press Ctrl + P (Windows) or Cmd + P (Mac).
- Click Destination > See More.
- Select your Printer and click Print.
3. Print via Wi-Fi Direct (If No Internet)
- Enable Wi-Fi Direct from your printer’s control panel.
- Connect your phone/computer to the printer’s Wi-Fi.
- Print using Smart or the default print option.
First things to do
Steps to Align Printers using Software
Step-by-Step Alignment with Smart App
- Ensure that your printer is connected to your computer and powered on.
- Install the Smart App: If you haven’t already installed the Smart App on your computer, download and install the same from Official website. Follow the on-screen prompts to install the software.
- Open the Smart App: Launch the Smart App on your computer.
- Access Printer Maintenance: Within the Smart App, look for an option or tab named printer settings.
- Locate Alignment Option: In the settings section, find the option for Print Quality Tools . Then navigate to option which might be called “Alignment,” “Align Print Head,” or something similar.
- Follow on-screen instructions: Click on the alignment option, and the Smart App will guide you through the alignment process step-by-step. Typically, you’ll be asked to load a sheet of plain paper into the printer and initiate the alignment process.
- Print Alignment Page: The Smart App will print an alignment page with patterns or lines. Make sure the printed page is placed face-down on the scanner glass or in the automatic document feeder (ADF), depending on your printer model.
- Scan Alignment Page: Follow the on-screen instructions to scan the alignment page using your printer’s scanner. The software will analyze the scanned page and make necessary adjustments to align the print head.
- Alignment Complete: Once the alignment process is finished, the Smart App will display a confirmation message indicating that the alignment was successful. You can then close the Smart App.